DIY Pool Ball Artwork
- Megan

- Feb 1, 2020
- 3 min read
Here's how I made this DIY wooden wall art to decorate a basement with a pool table!

I was recently commissioned to help a friend decorate their basement. They wanted it to be cozy and include the things their family loves. This also needed to include the pool table they would be putting down in the basement. I was on the hunt for wall art that wasn't super expensive and gave the room a cohesive feel. There is not a lot out on the market in the world of "pool table art". So I started brain storming artwork that I could DIY for the wall. I wanted to create a piece of art that looked like the triangular rack getting the pool balls in their starting position.
I wandered the aisles of Hobby Lobby looking for things that could bring my idea to life. I wanted to make an oversized version of what the real thing would look like.
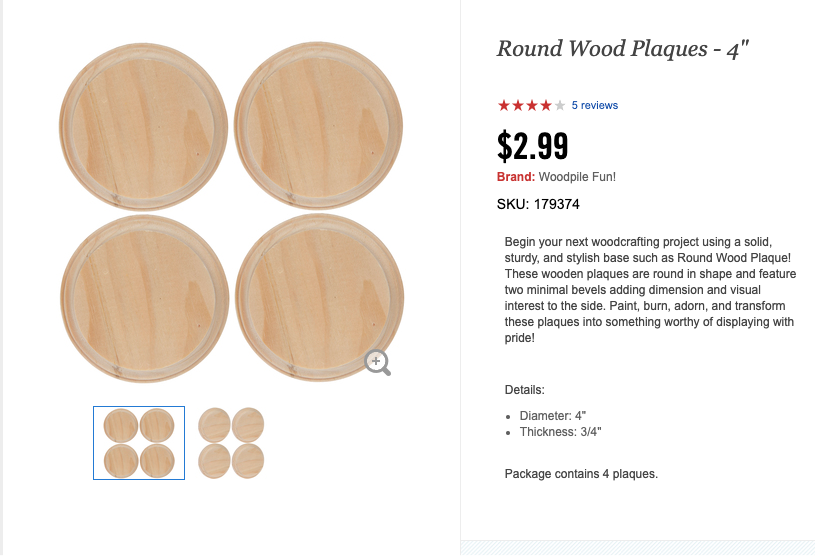
These are the supplies I needed to create the pool balls.
Pool Ball Supplies


The names of the paint colors I used were:
- 11039 Wine (Anita's Acrylic)
- 1114101 Tomato Red (Anita's Acrylic)
- 11140 Pumpkin (Anita's Acrylic)
- 11053 Buttercup (Anita's Acrylic)
* This one was not exactly the mustardy yellow that I wanted. I ended up mixing in a little orange, but if you can find a more mustard color I would go with that.
- 11182 Christmas Green (Anita's Acrylic)
- True Blue (DecoArt)
- 11148 Purple Pansy (Anita's Acrylic)
You will also need:
- Paint brushes
- Good painters tape or
- A pencil & ruler.
(I started with the tape, but it was bleeding through and not creating a crisp line. So instead I drew a line with a pencil and ruler. Then I used my artist brush to create a straight line with the paint.)
Step 1
Spray the 4 inch circles with the modern white matte spray paint. I did about 3-4 coats. Make sure spray from about a foot away and spraying light even coats will keep the paint from sagging or pooling up. Let it dry between each spray.

Step 2
For the pool balls with stripes, I measured a 2.25inch area and drew a line with a ruler and a pencil. I tried to center it as well as I could, just make sure there is room for the smaller circle to fit inside. On my first attempt I used a taped line, but the paint bled through and I couldn't get the line very crisp. I ended up just using the pencil lines and my paint brush to free hand the lines.


Step 3
I printed out a photo of a what a real set of pool balls would look like. This helped me to match the paint colors and see how many I need solid and how many striped.

I painted each circle according to the stripe and color chart. I did around two coats on each to make sure the color covered up the wood. I did paint the sides as well.


Step 4
Lay out the numbers and spray them with the black paint.


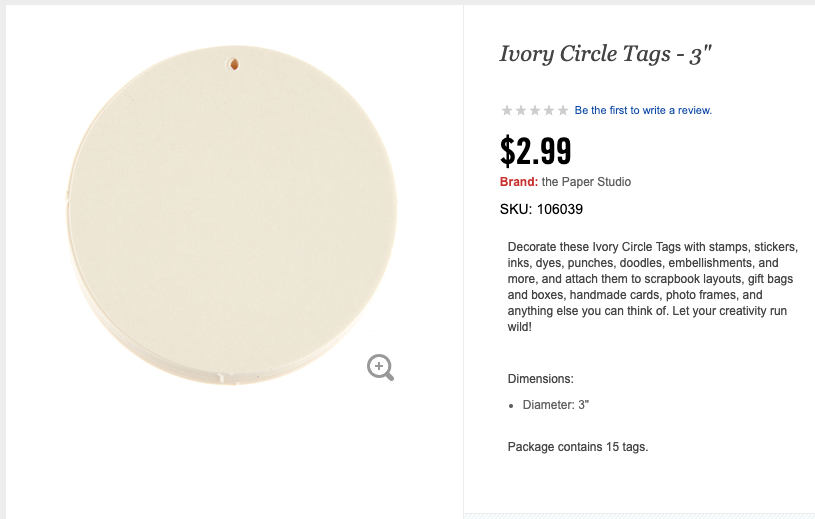
Step 5
Hot glue the numbers onto the ivory circle tag. You will need 1-15.


Step 6
Once the numbers have dried and are securely on the smaller circle, hot glue the entire thing to the middle of the coordinating painted circle.


Step 7
I decided to distress each one a little bit. This added a little more dimension to them.


Pool Rack Supplies


- White spray paint
- Black spray paint
- Sanding block
- Wood glue for hot glue gun
- 1/5 inch Screws
- Sawtooth hanger
- Hammer / Measuring tape / Miter saw / Jigsaw
Step 1
Measuring and cut 3 (26 inch) long sides for the triangle. The angles on both ends of the pieces will be 30 degrees. Spray paint each of them black. Once they dry completely I used a sanding block to rough them up and distress them a bit.


Step 2
Cut the plywood into a 24 by 24 by 24inch triangle, or as large as you can get it from the plywood square. It's ok if it doesn't reach the far edges of the 1 x 2. This gets painted white.

Step 3
Once all the painted wood has dried, screw the plywood triangle onto the backs of the 1x2's.


Step 4
Position the cue balls in their designated spots. Make sure to start with a solid at the top and go with a solid / stripe pattern around the edge. Also make sure the 8 ball goes in its correct spot. Then use the hot glue gun to secure them in their spots.


Step 5
Last step is adding the sawtooth hanger onto the back.
And there you have it! A fun DIY art piece you can proudly display anywhere you have a pool table!


Comments